Custom events in Drip allow you to track just about anything you can think of related to your blog, website or online business as it relates to your subscribers.
Think about it like this . . . your subscribers are on a journey, and along that journey, there will be different milestones. Your business milestones will be different from mine.
And while Drip is good at tracking a lot of the basic events and even many of the advanced ones, having the ability to customize event tracking is important.
If I think about my business, I want to know when someone visits my sales page, when they click the buy button, and of course, when they successfully sign up for my coaching club.
Knowing those things and having Drip use terminology that’s relevant to my business gives me the ability to understand what’s actually working. This empowers me to take action.
How Custom Events are Displayed
When looking at a subscriber’s details, you can see an activity feed of everything they’ve done.
The things they subscribed to, the emails they’ve received opened, replied to, etc.
If you have Drip tracking on your website, you can also see the pages they visited.
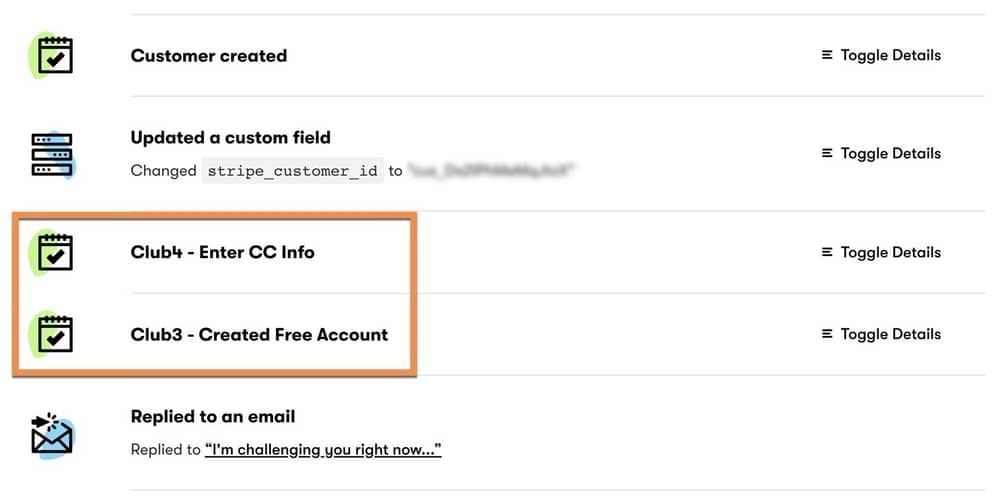
If you are tracking custom events, these will also show up. In the following example from a subscriber in my Drip account, you will see the following custom events:
Created a free account.
Entered their Credit Card info
Because these events are important to my business, I want to know when they happen.

How to Set Up Custom Events
The concept is simple – recording an event is an action. You can set actions in Rules and you can also do them in workflows.
If you don’t know the difference between the two, I encourage you to check out my other tutorial on the difference between Rules and Workflows.
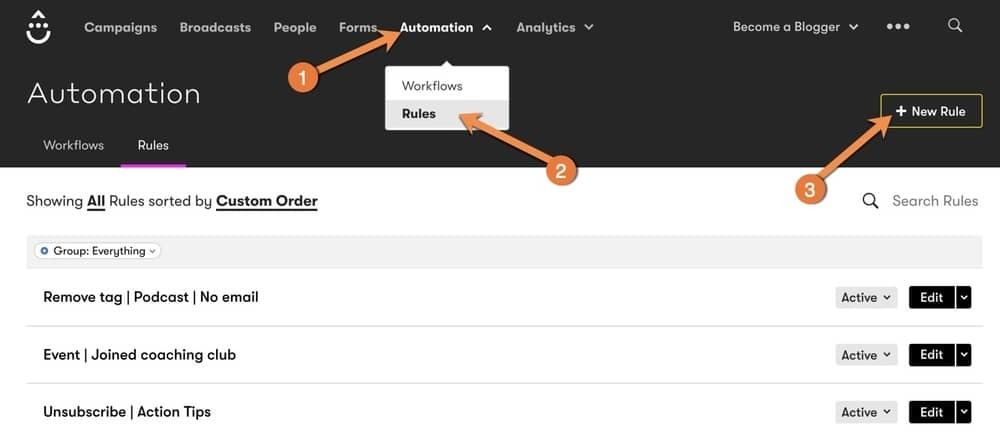
To set one up as a Rule, click on “Automations” and then go to Rules.
Once there, click on the “New Basic Rule” button and give the rule a name.
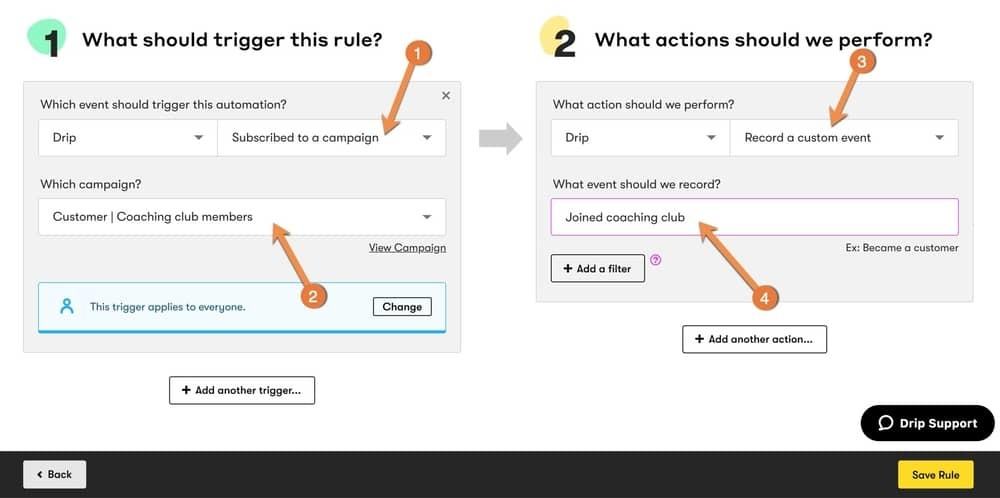
You can now choose whatever event you want to trigger that custom event.
For this example, I will choose “Subscribed to a campaign” and then choose the “Coaching Club Members” campaign.
Now, I know for my business that whenever someone joins my membership, they get subscribed to that campaign. So I can use that as the triggering condition. This will be different for your business and your event.
For the action, select Record a custom event and give the event a name (i.e. Joined coaching club).

Drip has 3 recommendations for naming events:
1. Be descriptive, but not too complex
2. Use past tens like joined instead of join
3. Capitalize only the first word
The main reason for these recommendation is so that your naming is consistent across all your events. It helps you to keep things neat.
For more detailed recommendations, check out my tutorial on creating a naming structure in Drip.
Once you’re done with the rule details, click on Save Rule. Then activate the rule by clicking on Draft and then on Activate.
Your event will be recorded every time this trigger condition is met.
Now as I mentioned, you can also do this in your automation workflows and while I’m not going to show you how to do that here, the steps are very similar.
Plus, you can always check out my earlier tutorial on How to Create automation workflows in Drip.
QUESTION: What custom events will you track in Drip? Go ahead and leave your answer to this question in the comments area below.


