According to the CAN-SPAM Act, to be able to use email lists legally in your business, you have to make it easy for people to unsubscribe from your email list AND you have to include a valid physical address.
Now, there are other things in that CAN-SPAM Act, but they aren’t relevant to your footer settings, so I won’t cover them here.
But here’s the problem – most people with email lists just keep the default info in their footer. Whatever Drip has is what they keep.
But Drip doesn’t know your business by default, so you may want to make some changes.
How to Customize Your Campaign Footer
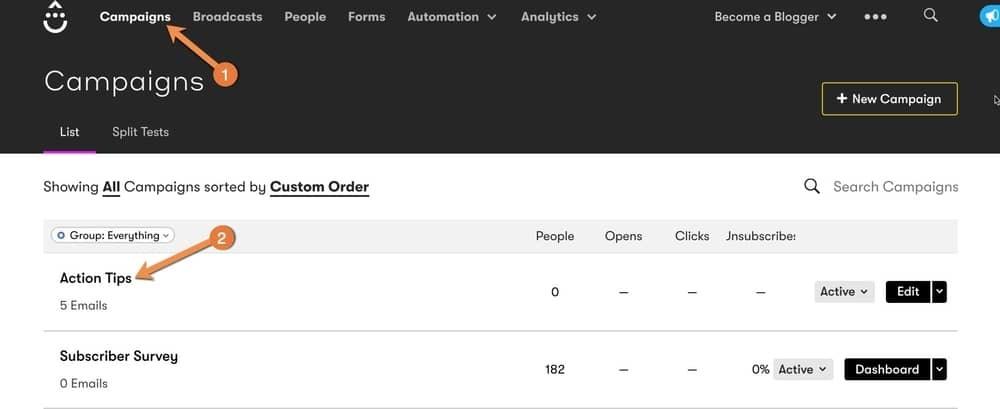
To do this, go your Campaigns in Drip.
Click on the campaign with the footer you want to customize.
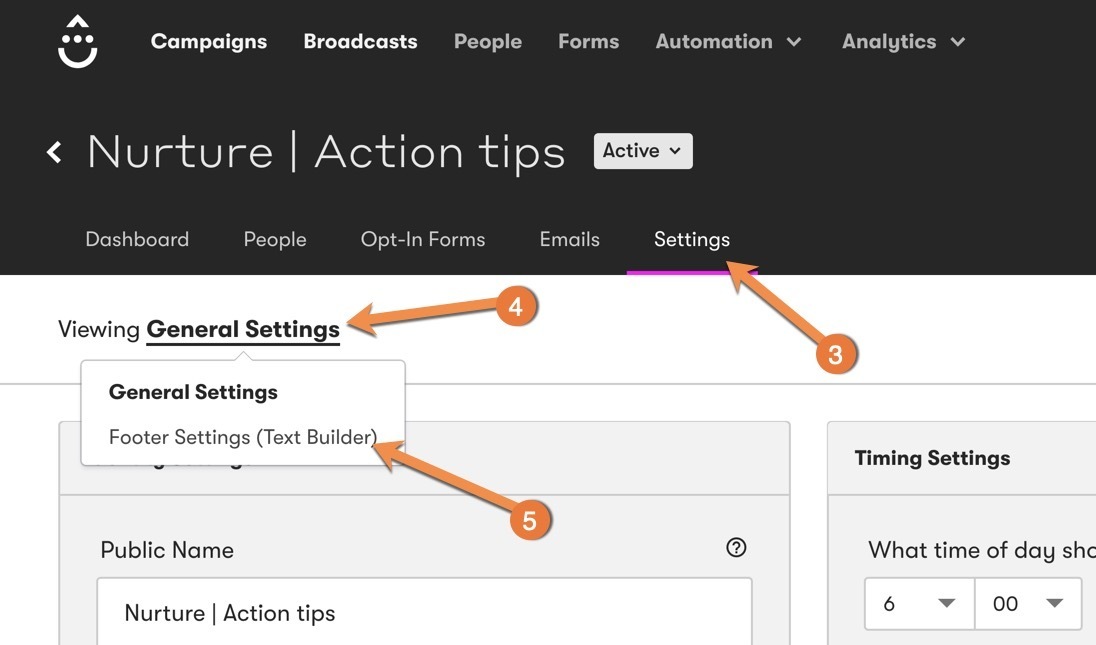
Then click on “settings”. Once there, you’ll see the general settings.
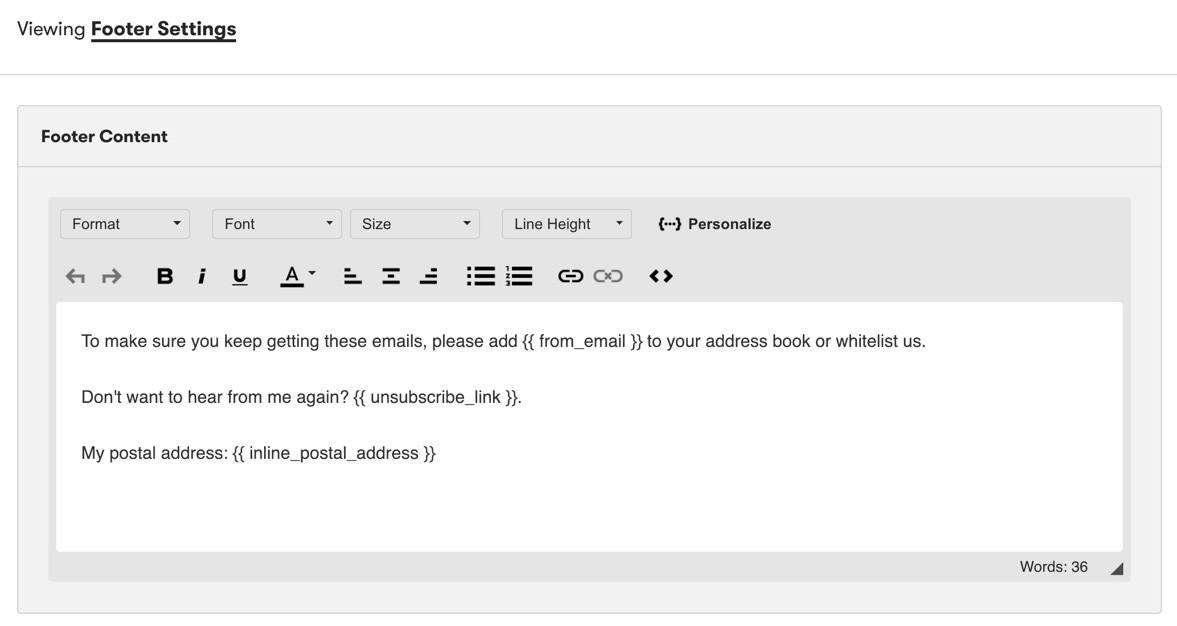
Click on “General Settings” and select “Footer Settings”. This is where you’ll see the content that shows up in your footer.


Here's what you see by default:

The unsubscribe link will then take them to the page to unsubscribe. This can actually be customized, as shown below..
How to Customize Your Unsubscribe Link Settings
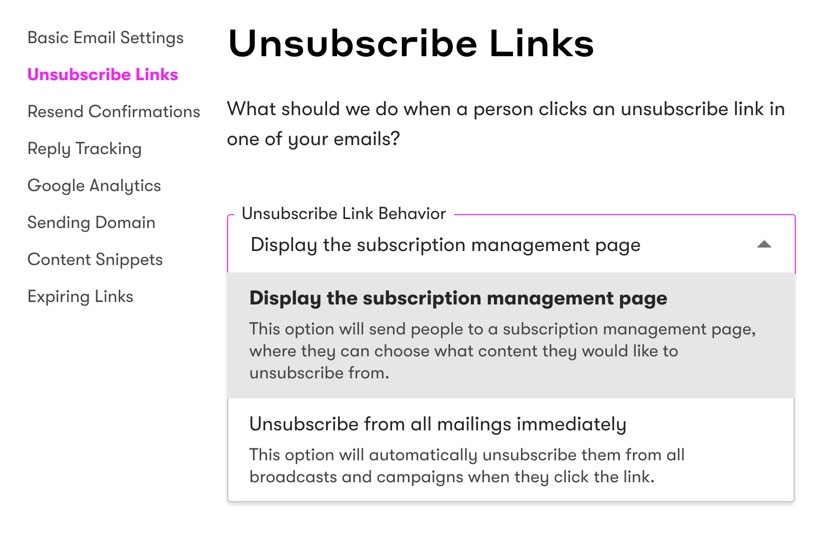
To do so, click on the three dots to the top right of your Drip account. Then come to “Email Setup” and click on Unsubscribe links.
This is where you set what happens when someone clicks that Unsubscribe link.
I always choose the Subscription management page where they can choose what they want to be unsubscribed from.

More About Your Campaign Footer Settings
The next thing you see here is Our postal address: and then this code here that automatically adds in your mailing address.
Now, some people, myself included, are uncomfortable just putting their home address here. And yes – you should be.
So what I did was get a P.O. box at my local post office and that’s the address I use.
Now let’s talk really quick about what you may want to do in your footer message. Let’s say you have a daily email that you send out.
Well, if that’s the case, I can assure you that there are people who are gonna just get tired of your daily emails who would much rather get a weekly email from you.
If the only option they have is to unsubscribe, that’s what they’ll do and you’ll lose a potentially valuable subscriber.
Or let’s say you’re doing a specific promotion where you have a 7-day campaign for a product you’re selling. Someone on your list that’s very interested in what you have to offer may NOT be interested in that particular campaign.
By giving them the ability to easily remove themselves from just that campaign, you will lessen the chance that they will unsubscribe from all your stuff.
A good message to have would be something like:
To stop getting my Action Tips, but still get all of my other valuable emails on building a business with a blog, click here.
Then, highlight “click here” and click on the link Icon. Then click on “Trigger link” and select an automation rule.
If you have an automation rule already created to Unsubscribe them from your campaign, you can select that here.
Once you’re done customizing the message, you can click on the “Save Settings” button.

QUESTION: Now that you’ve gone through this tutorial, what message will you include in your email footers. Go ahead and leave your answer to this question in the comments area below.

