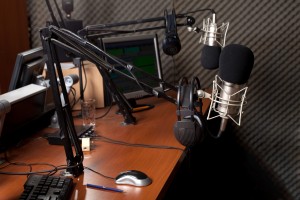
If you're gonna do a presentation on How To Podcast like a pro and never edit, you might as well do it as a live demonstration. How do you do that? By recording a podcast right there of course.
Listen to This Episode
[smart_track_player url=”https://soundcloud.com/learningwithleslie/100-how-to-podcast-like-a-pro” title=”100 How to Podcast Like a Pro and Never Edit – Say Goodbye To Post Production (+Video and Resources)” background=”default” ]
Well that's EXACTLY what I did. On January 8th, I was privileged to speak at the New Media Expo in Las Vegas, NV and I recorded this very special episode, both as an audio podcast AND as video. Yes, I went all out on this one.
In fact, you can watch the video right here:
In the presentation, I covered:
- Who I was and Why I got into Podcasting
- What my podcasting workflow looked like before and what it looks like now
- Different equipment options for podcasting professionally
- How To Go about PLANNING your episode
- How to deal with mistakes
But here's the thing. This is Episode 100, which is a pretty big Milestone. And to celebrate, I decided to go all out and try to make this podcast episode and blog post into a significant resource for anyone interested in getting into podcasting.
That's where this next section comes into play 🙂
What's YOUR Podcasting Budget?
 When it comes to podcasting, there are so many equipment options that it can be difficult to make a decision. I wanted to put together a resource to go along with my presentation that can work for any budget.
I know how it is to be just starting out and not have money to spend on expensive equipment. However, that's no reason not to start podcasting. I put together packages that range from under $60 to $1,000+. With ALL of these setups, you will get a good quality recording. However, as expected – the more you spend, the better quality you will get.
These packages are put together in a way that you can start with the absolute minimum, get a good quality sound, and upgrade in the future by just adding other components to what you already have. So, you don't have to worry about your equipment no longer being applicable as you grow.
If you have questions about any of the products, don't hesitate to ask in the comments section below. I LOVE this stuff. In fact, many people don't know this but I'm actually a certified Recording Engineer. I love audio production so much that I had to get all official and stuff!
To see the details of any of the packages, simply click on any of the following options . . .
Under $60 Budget
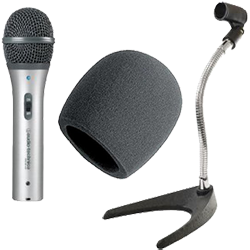
- Audio-Technica ATR2100-USB Cardioid Dynamic USB/XLR Microphone – $43.60
- Microphone Windscreen – $3.99
- Desktop Mic Stand – $10.15
Total Cost: $57.74
Notes: With this setup, you can get started with a good quality sound for a low price. Microphone is both USB AND XLR. This means that you can start recording by plugging it into your computer via USB directly, and if you decide to upgrade to a mixer in the future, you can bring it along with you.
$200 Budget
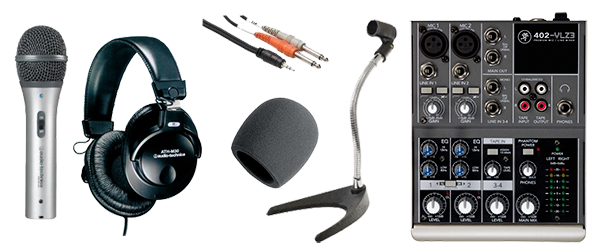
- Audio-Technica ATR2100-USB Cardioid Dynamic USB/XLR Microphone – $43.60
- Microphone Windscreen – $3.99
- Mackie 402-VLZ3 Mixer $99
- Audio-Technica ATH-M30 Professional Studio Monitor Closed-back Dynamic Stereo Headphones – $41.98
- Dual 1/4 inch to 1/8 inch cables (qty=2) – $$6.12 each (Buy 2)
Total Cost: $200.81
Notes: Having a Mixer gives you more control over what you can do. If you are doing Skype interviews you can adjust your volume and your interviewee's audio separately, and can even bring in sound from your computer while making sure that the levels are set EXACTLY how you need them to be. The mixer will be plugged into your laptop for recording.
$400 Budget
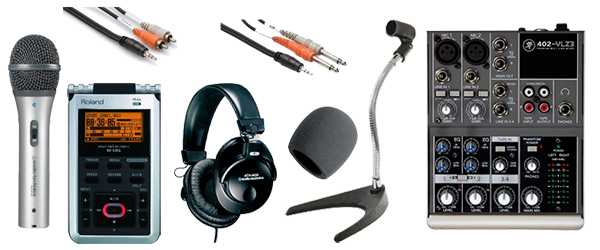
- Audio-Technica ATR2100-USB Cardioid Dynamic USB/XLR Microphone – $43.60
- Microphone Windscreen – $3.99
- Mackie 402-VLZ3 Mixer $99
- Roland R-05 – $199
- Audio-Technica ATH-M30 Professional Studio Monitor Closed-back Dynamic Stereo Headphones – $41.98
- Dual 1/4 inch to 1/8 inch cables (qty=2) – $$6.12 each (Buy 2)
- RCA to 1/8 inch cable – $5.28 (for digital recorder)
Total Cost: $404.79
Notes: This is the same as the setup above, except that it also includes the Roland R-05 digital recorder. The benefits to using a separate digital recorder and not your computer is that you significantly reduce the risk of your program crashing during a recording and you get a better quality sound with better control. You get to see your levels as you are recording and if you are out on the road, you can use it as a portable recording device for interviews and any other sound recording. It's a beautiful thing.
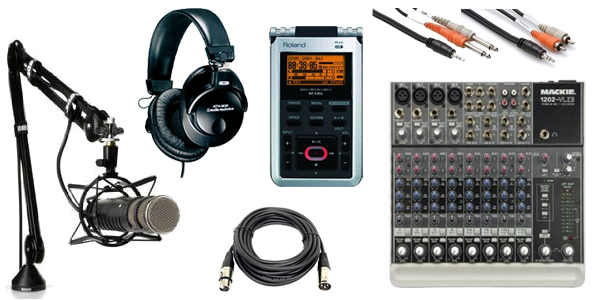
Under $750 Budget
- Rode Procaster Broadcast Dynamic Vocal Microphone – $229
- RODE PSA 1 Swivel Mount Studio Microphone Boom Arm – $99
- Rode PSM 1 Shockmount For Podcaster – $39
- 25 Foot XLR Cable – $14.99
- Mackie 402-VLZ3 Mixer $99
- Roland R-05 – $199
- Audio-Technica ATH-M30 Professional Studio Monitor Closed-back Dynamic Stereo Headphones – $41.98
- Dual 1/4 inch to 1/8 inch cables (qty=2) – $$6.12 each (Buy 2)
- RCA to 1/8 inch cable – $5.28 (for digital recorder)
Total Cost: $733.34
Notes: The difference between this setup and the setup above is that this one uses the Rode Procaster mic, which is a much higher quality mic than the desk arm. It also includes a Swivel Mount Studio boom arm and shock mount to give you that professional radio-station feel and quality. The shock mount makes it so that it minimizes the effect of vibrations of your desk and gives you an overall better quality.
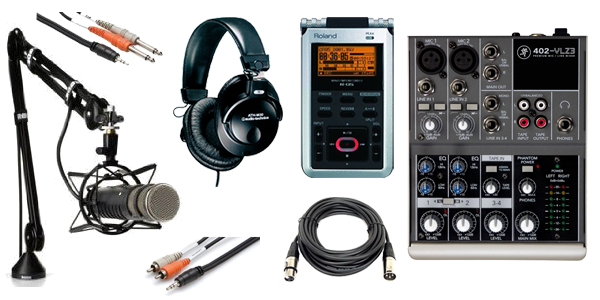
$900 Budget
- Rode Procaster Broadcast Dynamic Vocal Microphone – $229
- RODE PSA 1 Swivel Mount Studio Microphone Boom Arm – $99
- Rode PSM 1 Shockmount For Podcaster – $39
- 25 Foot XLR Cable – $14.99
- Mackie 1202-VLZ3 Mixer – $269.99
- Roland R-05 – – $199
- Audio-Technica ATH-M30 Professional Studio Monitor Closed-back Dynamic Stereo Headphones – $41.98
- Dual 1/4 inch to 1/8 inch cables (qty=2) – $$6.12 each (Buy 2)
- RCA to 1/8 inch cable – $5.28 (for digital recorder)
Total Cost: $904.33
Notes: This is the same setup as the package above, except for it uses a 12 channel mixer instead of a 4 channel mixer, giving you possibility for expansion in the future.
Leslie's Setup
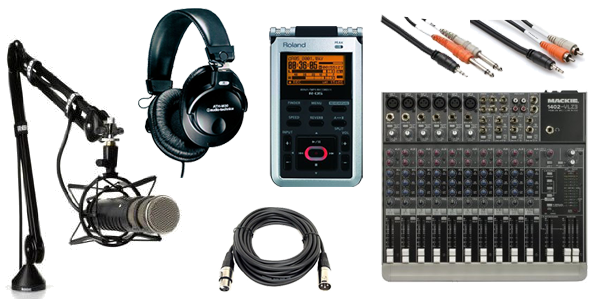
- Rode Procaster Broadcast Dynamic Vocal Microphone – $229
- RODE PSA 1 Swivel Mount Studio Microphone Boom Arm – $99
- Rode PSM 1 Shockmount For Podcaster – $39
- 25 Foot XLR Cable – $14.99
- Mackie 1402-VLZ3 Mixer – $399.99
- Roland R-05 – $199
- Audio-Technica ATH-M30 Professional Studio Monitor Closed-back Dynamic Stereo Headphones – $41.98
- Dual 1/4 inch to 1/8 inch cables (qty=2) – $$6.12 each (Buy 2)
- RCA to 1/8 inch cable – $5.28 (for digital recorder)
Total Cost: $1034.33
Notes: This setup uses a 14 channel mixer instead of the 12 channel mixer above. It's the Beast of a Setup that allows for even more expansion. It might be a bit unnecessary, but I like it. Also, the mixer uses volume sliders instead of knobs, which makes it easy to control the volume of your individual tracks
Miscellaneous Options
Behringer HA400 4-Channel Headphone Amp
If you are going to have multiple people in your podcasting studio, it's VERY useful to have multiple headphones. To accomplish this, you will need a headphone amplifier. This is a 4 channel one that I haven't tested, because I use a Mackie Headphone amp that has been discontinued. However, the reviews on Amazon are pretty decent, so I'm including it here.
Click Here To Download Transcript
Software:
- Skype – For doing Interviews
- Ecamm Callrecorder – For recording Skype Interviews on a Mac
- Pamela – For recording Skype Interviews on a PC
- Vodburner – For recording Skype Interviews on a PC (BETTER)
- Bossjock Studio – App for recording on the iPhone or iPad
Learning With Leslie Episodes:
- Pat Flynn Interview #1
- Pat Flynn Interview #2
- Guy Kawasaki Interview
- Interview With Rob and Kim Murgatroyd
- Interview Where I made a Mistake